Projections: Airplane Light Painting and Post-Processing
Photographer Tim Little made one of my favorite photos from the Eagle Field Night Photography workshop last year. A tiny 2 seater ERCO Ercoupe airplane sits out near the runway at an old WWII training base. Tim saw the potential of projecting the little airplane's shadow onto a nearby storage container. Before opening up his exposure, Tim and I experimented with different lighting angles and distances to get the plane projection just in the right spot. If you're shooting with a friend, have one person stand behind the camera to see what the camera sees, as the other person tests the lighting.
Once Tim nailed the lighting, he took multiple shots at about 2.5 minutes f/11, ISO 200. This exposure is a bit darker than an expose to the right (ETTR) image shot under full moon conditions. The slight underexposure helps keep the night time feel, and allows the light painting to pop.
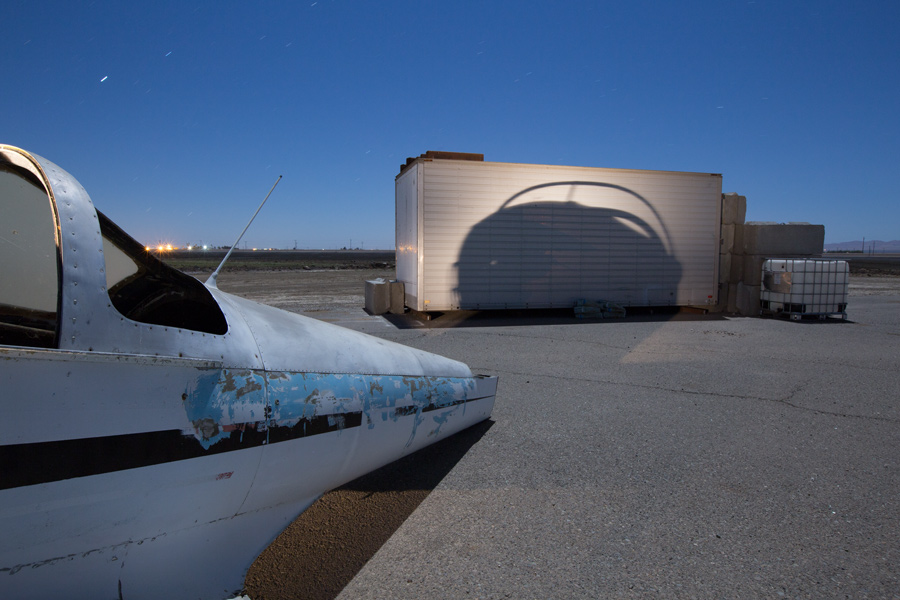
1. Light Painting - Above is the single exposure that shows the best version on the light painting, which was done with a flashlight.

2. Stacking and Masking - The camera is facing roughly to the south, which makes the star trails almost horizontal. To make the star trails longer, multiple shots were stacked in Photoshop, using Lighten blending mode on everything except the bottom layer.
Tim also used a non-lighted painted shot from the stack to mask out the light on the airplane and cement in the foreground. Having a non-light painted image in your star trail stack gives you an easy way to reduce or remove light painting from your image. This effect makes Tim's image more mysterious, because the projected light doesn't have an obvious source.
The image is starting to look really good, but there are a few more post-processing techniques that will help make the final photo really sing.

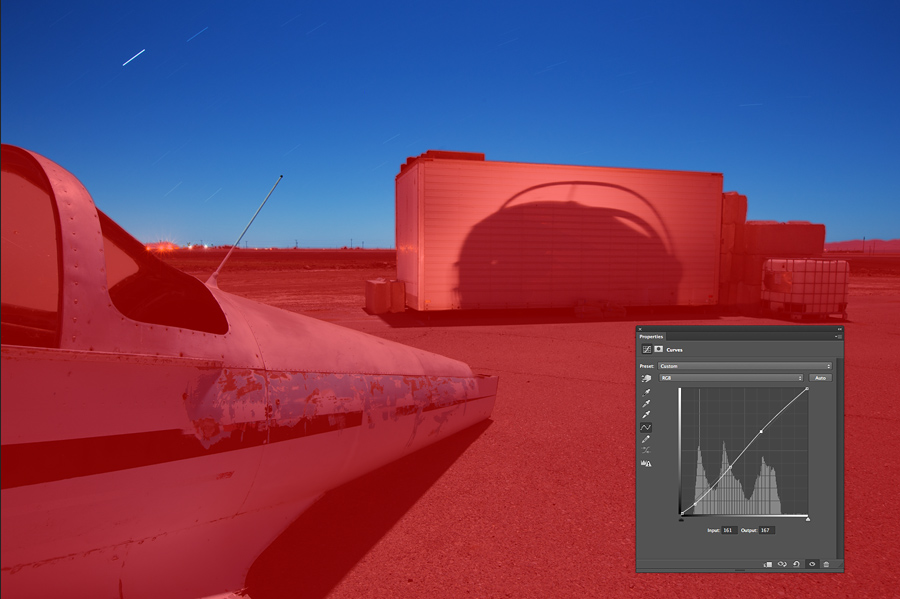
Projections 03: Curves for Contrast
3. Curves for Contrast - After reviewing the histogram, I used an S-curve to increase the overall contrast. This gives the plane a bit more shadowy mystery, and adds more snap to the projected image. The sky looks better, too. The S-curve could also be applied in Lightroom in the Tone Curve panel.
Projections 04: Sky Contrast Curve
4. Sky Contrast Curve - Using the Quick Selection Tool (W), I selected the sky. Then I created a new curves layer to add more contrast to the sky and star trails. The red area shows the part of the image that's protected from this adjustment. This selective adjustment is possible in Lightroom, but easier to do in Photoshop.
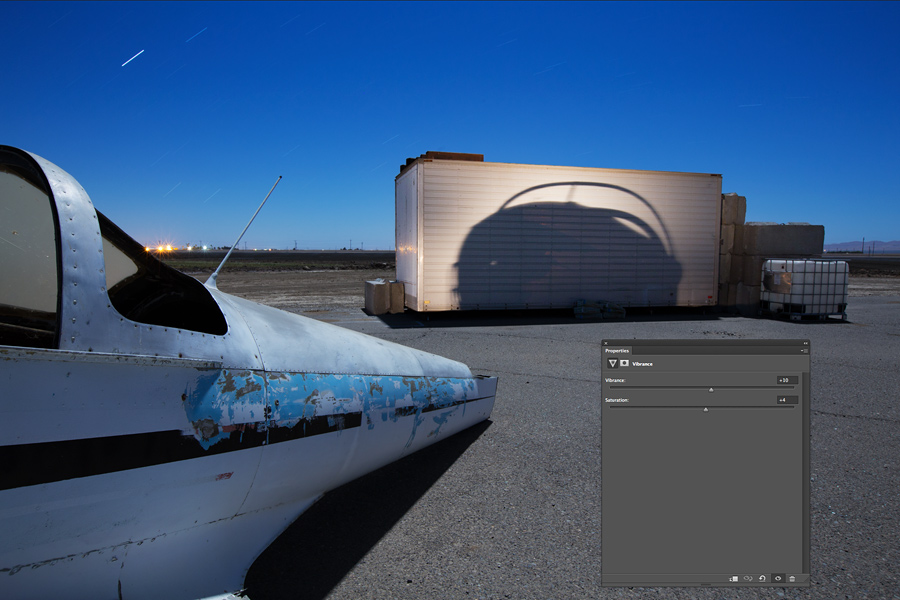
5. Vibrance - Next was a Vibrance and Saturation adjustment. This pushed the plane and sky towards blue, and increased the color contrast against the warmer orange light of the plane projection. You could also use Saturation, Selective Color, or a LAB conversion for this type of adjustment. Vibrance could also be adjusted in Lightroom.

6. Off-center Vignette - To make the projection even more dramatic, I created a vignette around the projected plane shadow. The curve adjustment above darkens everything except the projected plane shadow. Because the projection isn't in the center of the image, I used the Gradient tool to make a vignette just in this area (indicated by the red mask). Hit G for gradient, and adjust your tool bar to look like this:

Create a new Curves layer, and make sure the mask is selected. Then draw a line to create your vignette. If you don't get it right the first time, just try again. You can also create an off-center vignette in Lightroom using the radial vignette feature.

7. Selective Sharpening - Using the Marquee tool (M), I drew a box around the airplane and hit Command-J to put this selection on a new layer. I applied sharpening to this layer, and then added a black layer mask by holding down alt-option and clicking the new mask icon (aka, the front loading washer). Using a soft brush at 20-30%, I painted in some extra sharpening on the rivets and peeling paint of the airplane. This adjustment could also be done in Lightroom with the adjustment brush, but Photoshop offers more control.

8. Output Sharpening - At this point, the image is ready for output. If you're in Lightroom, simply use the Export setting with the appropriate amount of output sharpening for screen. In Photoshop, flatten the layers, go to Image-Image Size, choose your dimensions, select Bicubic (best for smooth gradients), and click OK. Apply output sharpening using Smart Sharpen, Unsharp Mask, or a plugin. Then save for web.
I'd like to thank Tim Little for giving me permission to feature this image on my blog. Want to hone your skills on night photography, light painting, and post-processing? Consider taking a night photography workshop!