Digital Night Photography: Test Exposures, Noise Reduction, and Image Stacking
Technical Details
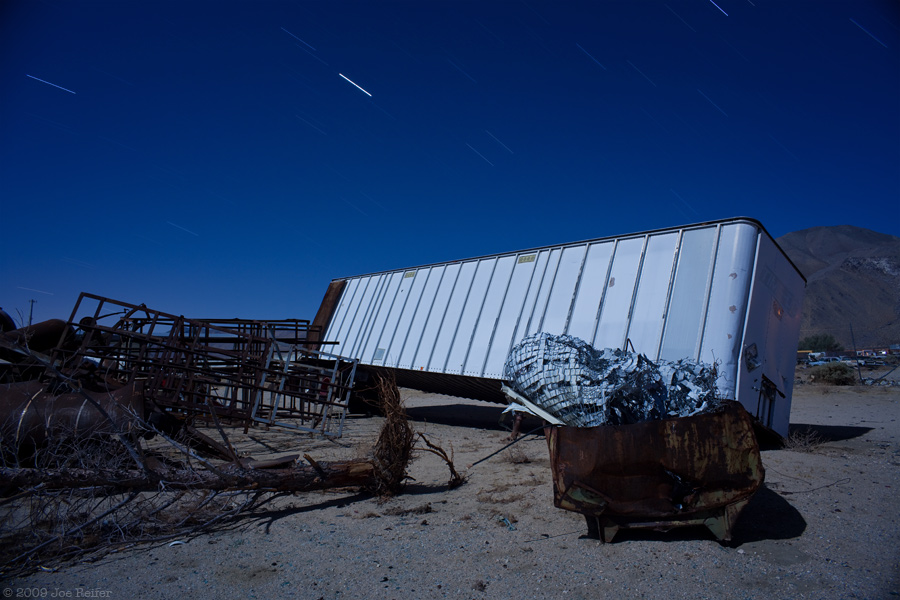
Canon 5D Mark II with an Olympus Zuiko 21mm f/3.5 lens -- the lens is very small, light, sharp, and has a manual focus scale. Long exposure noise reduction was turned off in the camera, greatly increasing productivity and battery life.
The test exposure to check the composition and histogram was 15 seconds at f/5.6, ISO 1600. Let's do the math: moving to f/8 is 1 stop, to f/11 is 2 stops, to ISO 800 is 3 stops, to ISO 400 is 4 stops, to ISO 200 is 5 stops. We compensate for closing down the aperture and reducing the ISO by changing the exposure length 5 stops: 30 seconds is 1 stop, 1 minute is 2 stops, 2 minutes is 3 stops, 4 minutes is 4 stops, 8 minutes is 5 stops. The result: 8 minutes at f/11, ISO 200. Because the main subject is white and metallic, I protected the highlights by slightly reducing the exposure to: 7.5 minutes at f/11, ISO 160.
To achieve the 15 minute star trails in the image above, I set the Canon TC-80N3 Timer Remote to make 2 exposures in a row of 7.5 minutes at f/11, ISO 160. I adjusted the RAW files for tone and color in Lightroom. With both files selected in Lightroom, go to the top menu and select: Photo -- Edit In -- Open As Layers In Photoshop. Next just set the top Layer to Lighten Blending Mode as pictured below to add the star trails together. Lighten Blending Mode adds anything on the top layer that's brighter to the bottom layer - when you flip to Lighten Mode, voilà - you've added the star trails together.
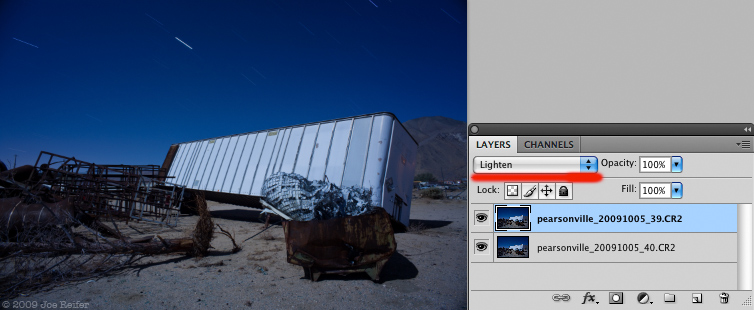
Remember: The secret to making this technique work is keeping the interval between exposures to 1 second or less. Otherwise you'll have unsightly gaps in your star trails. I hope this useful technique saves you time and battery drain. Give it a try the next time you're shooting at night.